Taking screenshots of your electronic device can be a great tool for journalists, but can be equally important for gamers who want to have a memory of a particularly important or breathtaking scene in a title, or want to capture a funny looking glitch. So you know how to take screenshots ahead of the handheld’s western launch next month, we’ve detailed the steps below.
Taking screenshots is pretty simple – all you have to do is hold down the PlayStation button, and the Start button at the same time – although this can be difficult to do if you’re using the touchpads. The main problem after is, unlike the instant screenshots on an iOS device, the Vita takes between 3-12 seconds (generally 7) to complete the process, with a “Saving…” logo popping up in the middle of the screen. Unfortunately, while this is happening, the game you take a screenshot of still plays. This wouldn’t be too much of a problem, except most command inputs on the Vita stop working (including the ability to pause the game). On Uncharted: Golden Abyss, the only input that works is the left joystick, which means for 8 seconds, you can only run away, but can’t shoot back, hide in cover or punch.
To copy the screenshots to your computer, connect your device to your Vita (which needs to be upgraded to the latest FW), ensure you have “Content Manager Assistant” installed on your computer, and that the PC is online. Then, open the CMA app on your Vita, choose “PS Vita System to PC”, click “Photo”, tick the screens you want copied and hit “Copy”. The screens are automatically sent to \Pictures on your computer, but you can change that on the settings of the PC version of CMA.
The next problem is that the 960×544 screens are automatically blown up on a computer, so you’ll see jaggies and low resolution gameplay on your larger-than-life images. A quick fix for this is to shrink the images, which you can do with image software like Photoshop or Gimp. But if you have multiple images, that could be a time intensive and tedious process. Software like Fotosizer can quickly shrink huge numbers of images – we suggest going with 600×340.
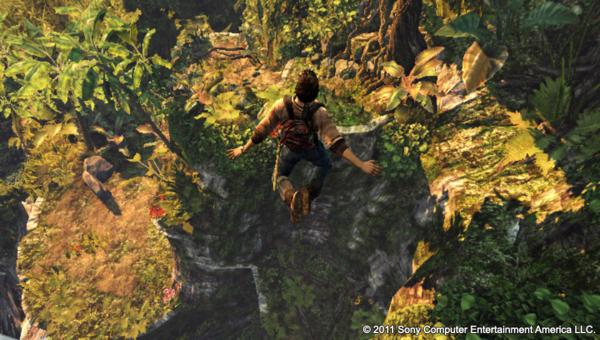
Here’s an example of the final product:

As you can see, the Vita actually watermarks the screenshots, in this case with a SCEA copyright logo, but sometimes with the game’s logo as well.
We’ll be taking advantage of this feature to provide you with tons of screenshots of the Vita’s hottest games, so be sure to stay tuned to PlayStation LifeStyle.


